Apple II without tape I/O? Whatever shall I do?
There’s a wonderful resource floating around that’s wonderful for Apple II users who
just want to load things onto their system, the Apple Game Server.
The README describes how you use it, but the basic idea is you just plug the headphone jack of a
modern system into your Apple II, hit LOAD, and wait a little. They’ve got a lot of software available,
and you could have a lot of fun exploring.
Unfortunately, there is one limitation that impacts me: you need to have the tape I/O ports on your Apple II! Every single model of the original Apple II could do this… except for the IIc and IIc+. And my poor IIc is feeling left out. Sure, I can use a Smartport hard drive to boot up Total Replay, and I can use my Floppy Emu, and I can even use the serial cable I have, some floppy disks, and ADT Pro to write a disk image to a real floppy drive. I’ve got plenty of choices… But what if I want to run the exact games off the Apple Game Server?
Well, as it turns out, I’m not completely left out. There’s ways I can make all of these work and get them into my lovely IIc and get them to boot. Some of them aren’t even 100% silly, shockingly enough!
Type into monitor over serial
A keen eye may have noticed a .mon file associated with all of the games on the Game Server. If you download one
of these, it resembles the language for the Woz monitor in the Apple II’s firmware. That’s no mere resemblance,
they can be typed in just fine. If you were dedicated enough, you could in fact treat these as type-in programs
as though they came from a magazine.
I don’t have that much dedication, though. I’d be much happier letting a computer do that for me. Thankfully, I can. I’ll just need a few parts first: a USB serial adapter, and an Apple IIc serial adapter. The IIc serial adapter might be hard to find; you can make your own by referencing documentation, but a much easier way is to purchase the cable from RetroFloppy, who simply sells them premade.
With the serial configuration of your choice, we can have the Apple II just start accepting input from the serial port, and get all the typing done for us. In the following I’ll be describing how I’ve done it, but the modern computer steps will vary based on your OS and preferred terminal emulator. The Apple II side, though, should be the same as it ever was, and I’ll only be replicating and pulling out details from the old documentation for the Super Serial Card from the 1980s.
Hardware prereqs
- A modern computer with a serial port or USB adapter
- A serial cable for your Apple II (see Retrofloppy for a premade cable)
- An Apple II (I will be using a IIc)
Software Prereqs
- A modern Unix, such as macOS, a Linux distribution, *BSD, etc.
-
picocom(installable frombrew picocom,apt-get install picocom, etc.) -
ascii-xfr, part of the
minicompackage (installable frombrew minicom,apt-get install minicom, etc.)
Process
-
Download the
.monfile you want to run. For this example, let’s use xevious.mon. -
On your modern PC, run
picocom --send-cmd "ascii-xfr -s -c 50 -l 100" --baud 9600 --databits 7 --imap crcrlf [SERIAL DEVICE]. This will start picocom, configured for:- 9600 baud, 7n1 (7 data bits, no parity, 1 stop bit)
-
mapping
CRtoCRLF -
with
ascii-xfras the data sending program, which will wait 50 ms per character, and 100 ms after each line
-
On the Apple II, type
IN#2, thenCtrl-a,14B, and thenCtrl-a,1D. This configures the Apple II to:- Read commands from serial,
- at 9600 baud, 7n1
-
(Optional) Then type
PR#2. This will write the output to your serial port, instead of the screen -
Type
CALL-151on your modern computer- This enters the Woz monitor
- Also, this confirms everything is set up right
-
Then, type
Ctrl-a,Ctrl-s, and finally the path to the.monfile-
So,
Ctrl-a,Ctrl-s,xevious.mon
-
So,
- Wait a long time…
-
Look at the start of the
.monfile for the hex bytes at the very start, before the:. This is the load address!-
In our example, this is
0801.
-
In our example, this is
-
Type the load address, followed by
G, on your modern computer
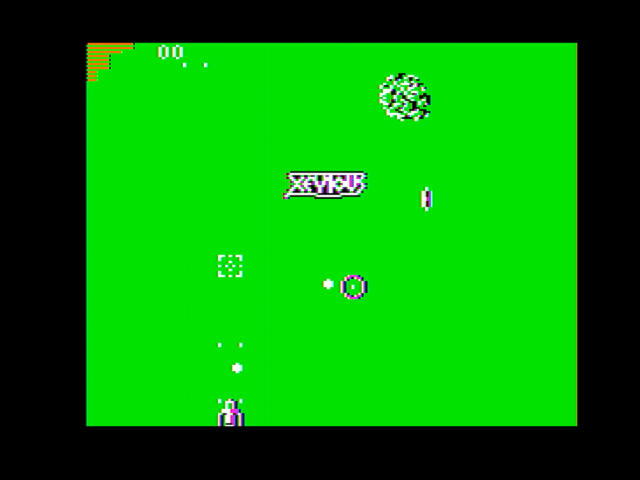
And now, we are gaming! Check out what it looks like on my IIc:

Wasn’t this worth it? … No? Well, okay, I have a couple faster ways, too.
Fancy ROMs and xmodem
This might have seemed slow and inconvenient. And of course, it is. But, incredibly enough, there is a faster way! .. At least, if you have an Apple IIc, and have already installed an upgraded ROM in the machine. ROM4x is an enhanced ROM for the Apple IIc, and one of its many features re-adds the tape loading functions in BASIC and the monitor. It does this with XModem over the serial port, at 115kbps. This actually works well, but is a little non-obvious. In fact, I haven’t seen any evidence anywhere on the Internet of this feature being used.
As before, I’m going to just be describing how I did it. You could use your own terminal emulator of choice, your own OS, etc. for much of this. Additionally, I am not going to describe how to install ROM4x on your machine. Perhaps I will in a future post, but it’s a bit of a tangent from what I’m trying to do. I will note briefly, however, that there is no difference between installing ROM4x and any other ROM upgrade on a IIc – flashing an EEPROM and installing it, and possibly cutting the jumper to enable a larger ROM, works exactly the same as with any other upgrade.
So without further ado, let’s go ahead, and try out a feature in an after-market ROM that hardly anyone has, for perhaps the first time!
Hardware prereqs
- A modern computer with a serial port or USB adapter
- A serial cable for your Apple II (see Retrofloppy for a premade cable)
- An Apple IIc, with ROM4x already installed
Software Prereqs
- A modern Unix
-
picocom(installable frombrew picocom,apt-get install picocom, etc.) -
sz, part of the [minicom] package (installable frombrew minicom,apt-get install minicom, etc.)
Process
First, let’s get the actual binaries to upload.
I could write up some process to turn those .mon files into binary files to load. Fortunately, all of them
have the underlying binaries too, ready for me to load. Just strip the .mon suffix, and we can grab them.
Unfortunately, these files aren’t in the format ROM4x wants. The file format it wants has a 4-byte header.
This header consists of:
- The load address, as a little-endian 16-bit integer
- The length minus one, as a little-endian 16-bit integer After this comes the raw binary we can download
This is not too complex, so let’s convert them:
- Download the raw binary file. For this example, we will use apple_invaders
-
Look at the
.monfile as well! Look at the first line, before the:. These hex digits are our load address.-
In this example, the load address is
0x03FD
-
In this example, the load address is
-
Find the file length, minus one
-
There’s lots of ways to do this, but
printf '%x\n' $(( $(wc -c apple_invaders | cut -f 2 -w) -1))was convenient for me. This requiresbashorzshor some other extended shell, but this should be fairly common -
In thix example, the length-minus-one is
0x4f7f
-
There’s lots of ways to do this, but
-
Output the header, followed by the binary
-
Since we need to write little endian integers, we’d write
0xFD,0x03for the load address, then0x7f,0x4ffor the length -
Here, we have:
echo -en '\0xFD\0x03\0x7f\0x4f' >apple_invaders.iic; cat apple_invaders >>apple_invaders.iic.
-
Since we need to write little endian integers, we’d write
I am confident this could be automated into a fancy script, but I have not as yet bothered.
Now, let’s load it up.
-
Run
picocom --send-cmd "sz -X -vv" --baud 115200 [SERIAL DEVICE]on your modern computer. This will:- Start picocom,
- at 115.2 kbps,
- set to send files over xmodem
-
On your Apple IIc, write
CALL-151to enter the monitor -
In picocom, type
Ctrl-a,Ctrl-s, and then the path to the.iicfile we prepared previously -
On the Apple IIc, type
0R, the load address, and thenG-
For example, with
apple_invadersthis would be0R03FDG
-
For example, with
- While it loads, there will be an indicator in the top right corner on the IIc, and a progress indicator in picocom.
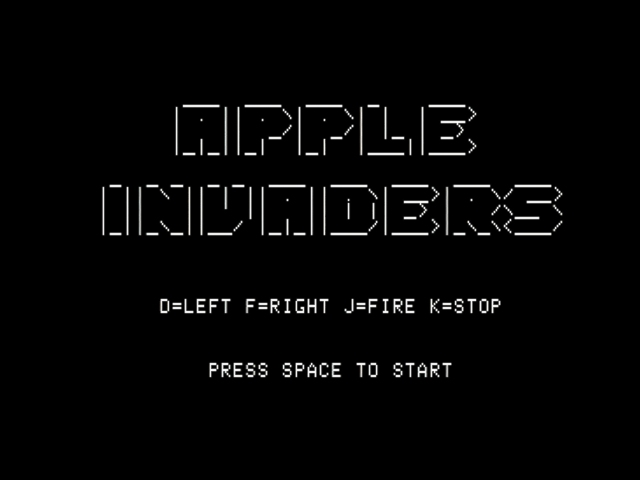
After a few seconds, we are gaming:

This may have taken a little bit to set up, but after the setup, this sure was quick!
Oh, what’s that, you want something even easier? Something you can use on an emulator, even? Well, okay, I have something for that too.
… Just use a floppy disk, silly
The binary file we grabbed previously can also be put into a floppy disk image, and then even written onto a floppy, if you’re a more sensible sort. To do this, I used AppleCommander, an Apple II disk image utility, and a copy of DOS 3.3. As a bonus, this should work well on any Apple II emulator, and not just real hardware.
Hardware prereqs
- A modern computer
Software Prereqs
- A modern Unix
- AppleCommander (you may need to manually install this)
Process
In the following, I’ll be using Galaxian, just for illustrative purposes:
- Download the binary file you want to run. We want Galaxian, which is at http://asciiexpress.net/gameserver/galaxian.
-
Download DOS 3.3. I saved this as
DOS3.3.dsk. -
Run
acx create -d galaxian.do --format DOS3.3.dsk --dos --size=140kb. -
This creates
galaxian.do(create -d galaxian.do), -
as a blank DOS3.3 5.25” disk (
--dos --size=140kb), -
with DOS3.3 installed on it (
--format DOS3.3.dsk). -
Look at the
.monfile (at http://asciiexpress.net/gameserver/galaxian.mon). At the very start is a pair of hex bytes, before a:. This will be our load address.-
In this example, it is
0x0801.
-
In this example, it is
-
Run
acx import -d galaxian.do --raw -t=B -a=0x0801 -n=GALAX galaxian-
This adds our
galaxianfile (import [...] galaxian), -
galaxian.do(-d galaxian.do) -
with no processing (
--raw), -
file type
Bfor “Binary” (-t=B), -
load address
0x0801(-a=0x0801, -
named
GALAX(-n=GALAX)
-
This adds our
-
And then, run
echo '10 PRINT CHR$(4);"BRUN GALAX"' | acx import -d galaxian.do --basic --stdin -n HELLO.-
This creates a
HELLOfile (the file DOS 3.3 will run when the disk boots) (acx import [...] -n HELLO) -
from stdin (
--stdin), -
which is a BASIC file (
--basic), -
with the appropriate incantation to run
GALAX(10 PRINT CHR$(4);"BRUN GALAX").
-
This creates a
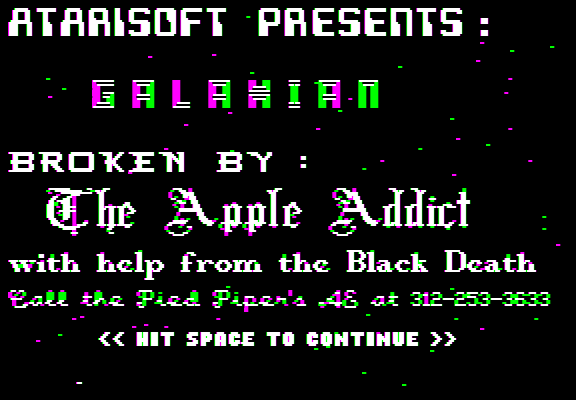
… And tada, galaxian.do is a bootable floppy disk image with the game on it. We can load it right in an emulator, and
we will see:

Was any of this worth it?
No, probably not! Most all of these exist in a wide variety of more convenient forms, such as Total Replay, or disk images you can find on the Internet Archive, or other Apple II archives. But we got to have a good time doing things with computers in a roundabout way, and isn’t that what it’s all about?